Overview
During the coronvarius pandemic, with too much free time on my hands, I became interested in 3D printing. I couldn't find an affordable, high quality 3D printer with the features I wanted on the market, so I decided to build my own. What followed was a six month journey of designing, building, and tuning.
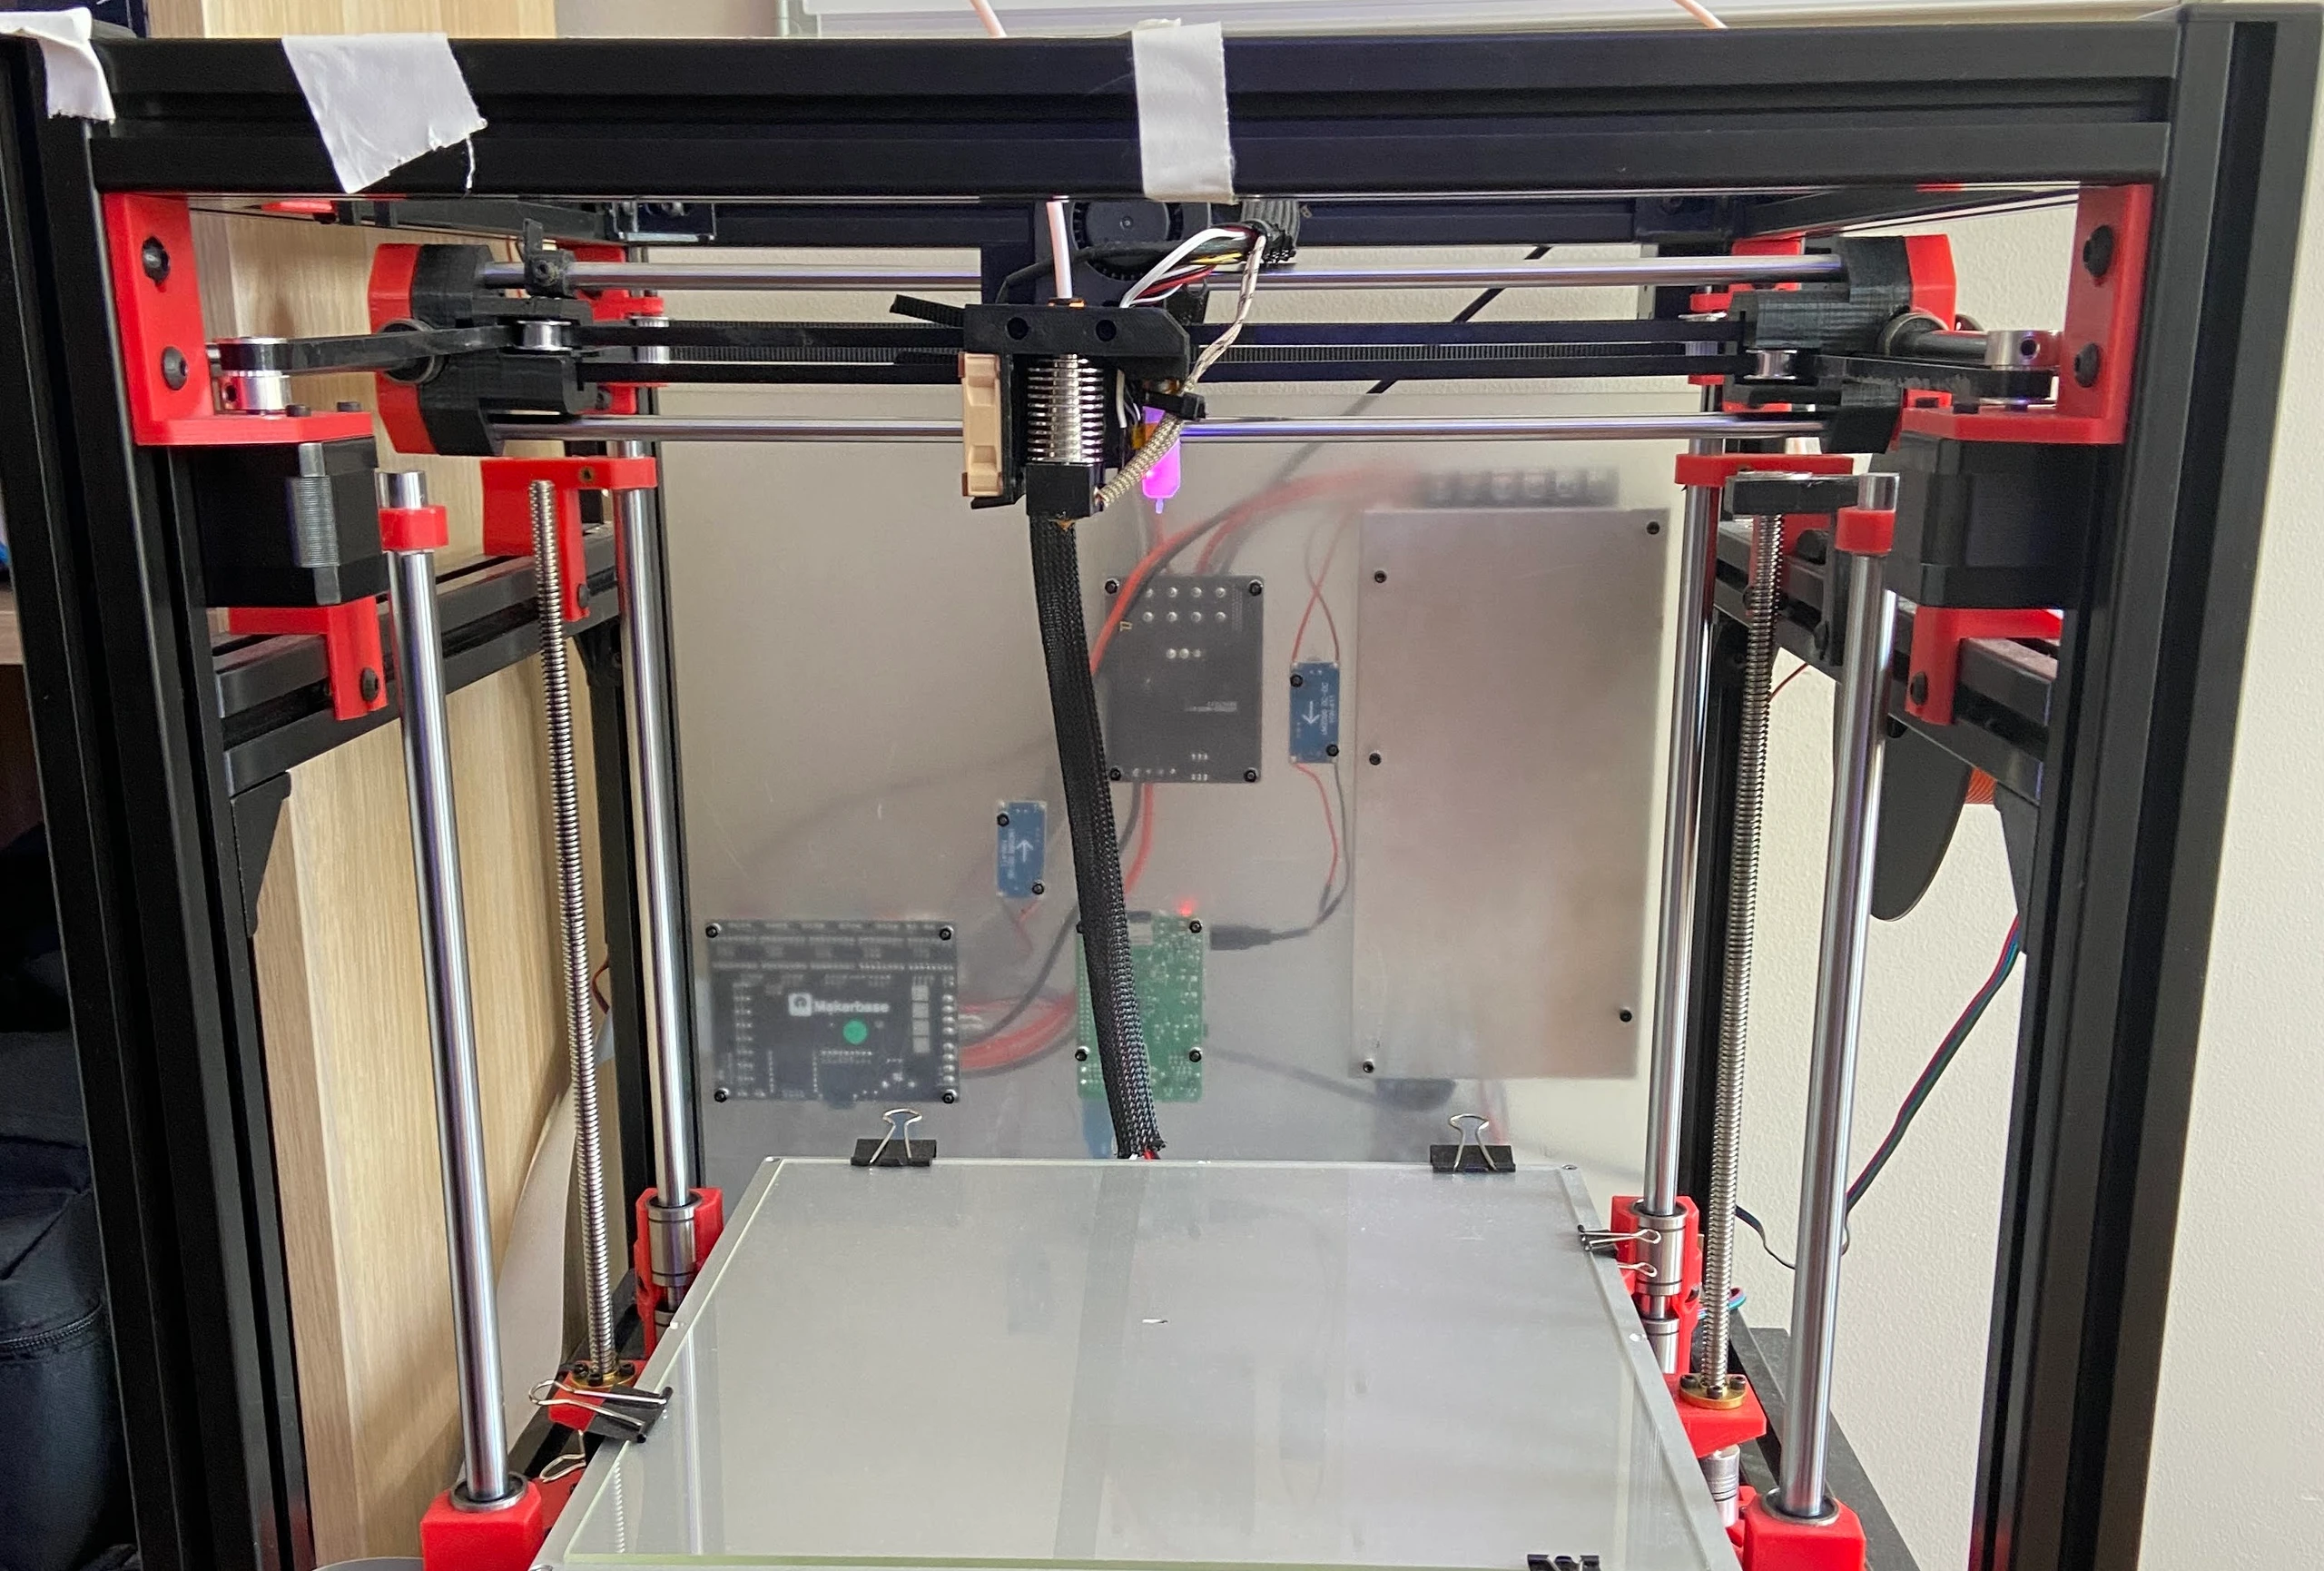
The printer allows for extremely high-speed printing and has a very large build volume (300mm^3). It is based on the open-source Hypercube Evolution frame with custom modifications for improved rigidity and print quality. I purchased the 3D printed parts for the frame from a 3D printing shop on Etsy. The electrical system is all custom, and firmware is a fork of Marlin.
CoreXY System
The CoreXY motion system drives the print head in two perpendicular directions, powered by two stepper motors. This system offers several advantages:
- Speed: Both motors work together for diagonal moves, enabling faster printing
- Precision: Reduced moving mass means less ringing at high speeds
- Reliability: Motors are stationary, reducing wear on moving components
- Simplicity: Belt paths are shorter and easier to tension
The system uses steel rods with ball bearings and timing belts for smooth, accurate motion. The z axis is driven by two stepper motors along threaded rods. The use of two motors for the z axis increases the stability of the print bed.
Aditionally, I use a Bowden extrusion system, which mounts the stepper motor for the extruder on the frame instead of the print head, guiding the filament to the print head via a PTFE tube. This reduces moving mass on the print head, enabling faster acceleration, but introduces additional complexity. Filament compression in the long, flexible tube creates a delay between extruder motion and actual flow at the nozzle. I needed to account for this in the firmware using retraction and pressure advance settings to ensure clean starts, stops, and speed changes.
Specifications
| Specification | Value |
|---|---|
| Build Volume | 300 x 300 x 300 mm |
| Max Print Speed | 150 mm/s |
| Max Travel Speed | 300 mm/s |
| Layer Resolution | 0.05 - 0.3 mm |
| Heated Bed | 120°C max |
| Hotend | E3D V6 all-metal |
| Frame | Anodized aluminum extrusion |
| Extruder | Bowden |
| Bed Leveling | Automatic - BLTouch |
| Bed Surface | Borosilicate glass |
| Power Supply | 24V 25A (600W) |
| Control Board | MKS Robin Nano (STM32) |
| Motor Drivers | TMC2209 |
| Remote Control | Raspberry Pi 3 + OctoPrint |
| Filament Runout Sensor | Yes |
| Touchscreen | 3.5" TFT LCD |
| Firmware | Marlin 2 |
Firmware
The printer runs an MKS fork of Marlin 2 with additional changes:
- Linear Advance: Improved extrusion control at speed changes
- Input Shaping: Reduced ringing artifacts
- Auto Bed Leveling: BLTouch probe for automatic mesh compensation
- Custom Menus: Tailored LCD interface for common operations
All firmware modifications are available in the GitHub repository.
Challenges
After building the printer, I struggled with layer quality, warping, and bed adhesion. I spent the better part of four months tuning the printer, and it was a major headache of issues. I would fix one issue, and another would crop up. 3D printers are incredibly fickle to debug, simply due to the amount of variables involved in producing a good print.
One of the major issues with 3D printers overall is that they use a mixture of unreliable closed-loop systems and open-loop ones. The stepper motors are open loop, meaning the firmware assumes the motor moves as commanded without any feedback, so skipped steps, stalls, and vibrations go undetected. Meanwhile, heated elements like the hotend or bed rely on a single thermistor and a PID loop, which approximates actual temperature and can't compensate for uneven heating. Together, these limitations make precise, repeatable printing a challenge and require careful tuning to compensate for the pitfalls of these control systems.
Extrusion is a particularly difficult problem to solve. Direct drive extruders are generally more reliable, as the motor sits right on the hotend, minimizing the distance the filament must travel and reducing compression in the system. Bowden setups, in contrast, introduce elasticity and lag that make precise flow control much harder, requiring longer retractions and careful tuning of pressure advance to maintain print quality.
Tuning Guide
After dealing with many of the above issues for months, I have a good understanding of how to fix them. Below is a brief guide for different issues and how to approach fixing them.
Mechanical
- Lubricate smooth rods and leadscrews.
- Ensure Z-axis moves freely without binding; secure lead screws with top bearings.
- Check belt tension: not too loose, not too tight.
- Align pulleys, eccentric nuts, and wheels properly.
- Spend extra time dialing in motion settings (acceleration, jerk) in firmware.
Bed and Adhesion
- Clean bed with isopropyl alcohol (for glass beds).
- Use high-quality filament.
- Dial in Z-offset with a test print.
- Start prints with purge line/skirt.
- Use adhesion aids if needed (glue stick, PEI, painter's tape).
- Use a higher print temperature for first layer (+10°C) to ensure good adhesion.
Extrusion and Layer Quality
- Check extruder gear tension (Bowden or direct).
- Spend extra time dialing in E-steps and flow rate.
- Tune pressure advance/retraction in firmware/slicer.
- Enable Z-hop for layer crossings.
- Monitor print temperature; adjust for stringing or poor bonding.
- Use a ramp up (from 0 to 100) across the first few layers for the cooling fan speed.
Filament Handling
- Use a high quality filament, not the cheap stuff.
- Stick with a tuned profile per filament.
- Use a filament cleaner before the extruder (I use a sponge with a hole cut in it).
- Store filament dry (sealed container with desiccant).
Maintenance and Testing
- Inspect screws, bearings, and nozzle wear regularly.
- Test new settings or filament with small calibration prints.
- Monitor prints after maintenance or setting changes.
- Keep firmware and slicer settings documented for repeatability.